

Quick Answer: The best internal wall insulation depends on wall condition, moisture risk, and available space. Options include insulated plasterboard, stud wall systems, and breathable spray cork.
Cold walls waste heat and create damp problems in homes. The right internal insulation stops heat loss while managing moisture safely. This guide explains the best methods, when each works best, and how to avoid trapping damp inside your walls after installation.
Key Takeaways
- Internal wall insulation reduces heat loss but must be installed with proper moisture control to prevent condensation and mould.
- Three main methods exist: insulated plasterboard, stud wall systems, and spray cork insulation, each suited to different wall conditions.
- A survey before installation identifies existing damp, ventilation issues, and structural problems that affect which system works safely.
Why Cold Walls Cause Damp and Heat Loss
Cold internal surfaces create condensation when warm indoor air hits them. That moisture turns into damp patches, and mould grows over time.
A couple of common factors tend to make condensation issues worse:
- Thermal bridges around windows, floors, and junctions let heat escape faster than through the main wall, creating colder spots
- Poor ventilation traps humid air indoors, increasing the risk of condensation on those colder surfaces
Current guidance in England setting U-value requirements and condensation control requires renovation work to address both energy efficiency and moisture control. Both need to be handled properly to meet building standards.
Building on that, retrofit design guidance requires an assessment of damp, mould, condensation, ventilation, and thermal bridges before any measures are installed. The aim is to understand how the whole property performs first.
This approach shows that whole-house moisture planning makes insulation safer and more durable in real homes.
The Best Ways to Insulate a Cold Wall from the Inside
Three main methods work for internal wall insulation in UK homes. These options deliver different balances between performance, space loss, and moisture safety. Your wall condition determines which works best.
Insulated Plasterboard
Insulated plasterboard consists of a pre-bonded insulation layer and plasterboard finish, forming a single, ready-to-install board:
- Typically manufactured in thicknesses ranging from 50–100 mm, combining insulation and internal lining in one product
- Designed for direct fixing to solid walls or timber/metal battens, making it suitable for uneven surfaces
- Best suited for dry, relatively flat walls, offering a quick and cost-effective installation method
Stud Wall Insulation
A timber or metal frame is built against the wall, usually reaching a total thickness of 100–150 mm once insulated and boarded. The cavity is filled with insulation before plasterboard is added. This suits uneven or cold walls and delivers the strongest thermal performance overall.
Spray Cork Insulation
Spray cork is applied as:
- Thin layers directly onto prepared walls, typically around 20–50 mm thick
- A breathable coating that lets moisture vapour move through instead of being trapped
Application is quick, with continuous coverage across the wall and no joints or gaps. For projects where moisture control matters as much as heat retention, we offer a breathable SprayCork solution. It helps reduce heat loss while managing damp, mould, and cold wall issues.
Choosing the Right Internal Wall Insulation System
Picking the right internal insulation depends on more than just cost or thickness.
Assess Moisture and Ventilation
Insulation must not trap damp inside walls. Walls should be dry before installation, with leaks, gutters, and rising damp addressed first. Ventilation also needs checking, as humid air increases condensation risk. Breathable materials then allow moisture to move through safely where required. Your wall condition determines which approach works safely.
Compare Space and Performance
Thicker insulation improves thermal performance but reduces usable room space. A 100 mm stud wall can take noticeable floor area from smaller rooms. Thinner systems save space but deliver smaller heat loss reductions, so the trade-off varies by room.
Consider Climate and Condensation Risk
Research shows that dynamic temperature and humidity patterns at thermal bridges assess mould risk more accurately than static methods.
Climate patterns matter too. The Met Office factsheet shows slightly wetter UK winters and longer-term shifts in rainfall. This explains why moisture-safe wall insulation becomes more important over time, especially in exposed conditions.
Choose the Right System for Your Property
The right choice depends on your specific situation and property type. Here’s a quick visual guide to help you match your situation to the right system
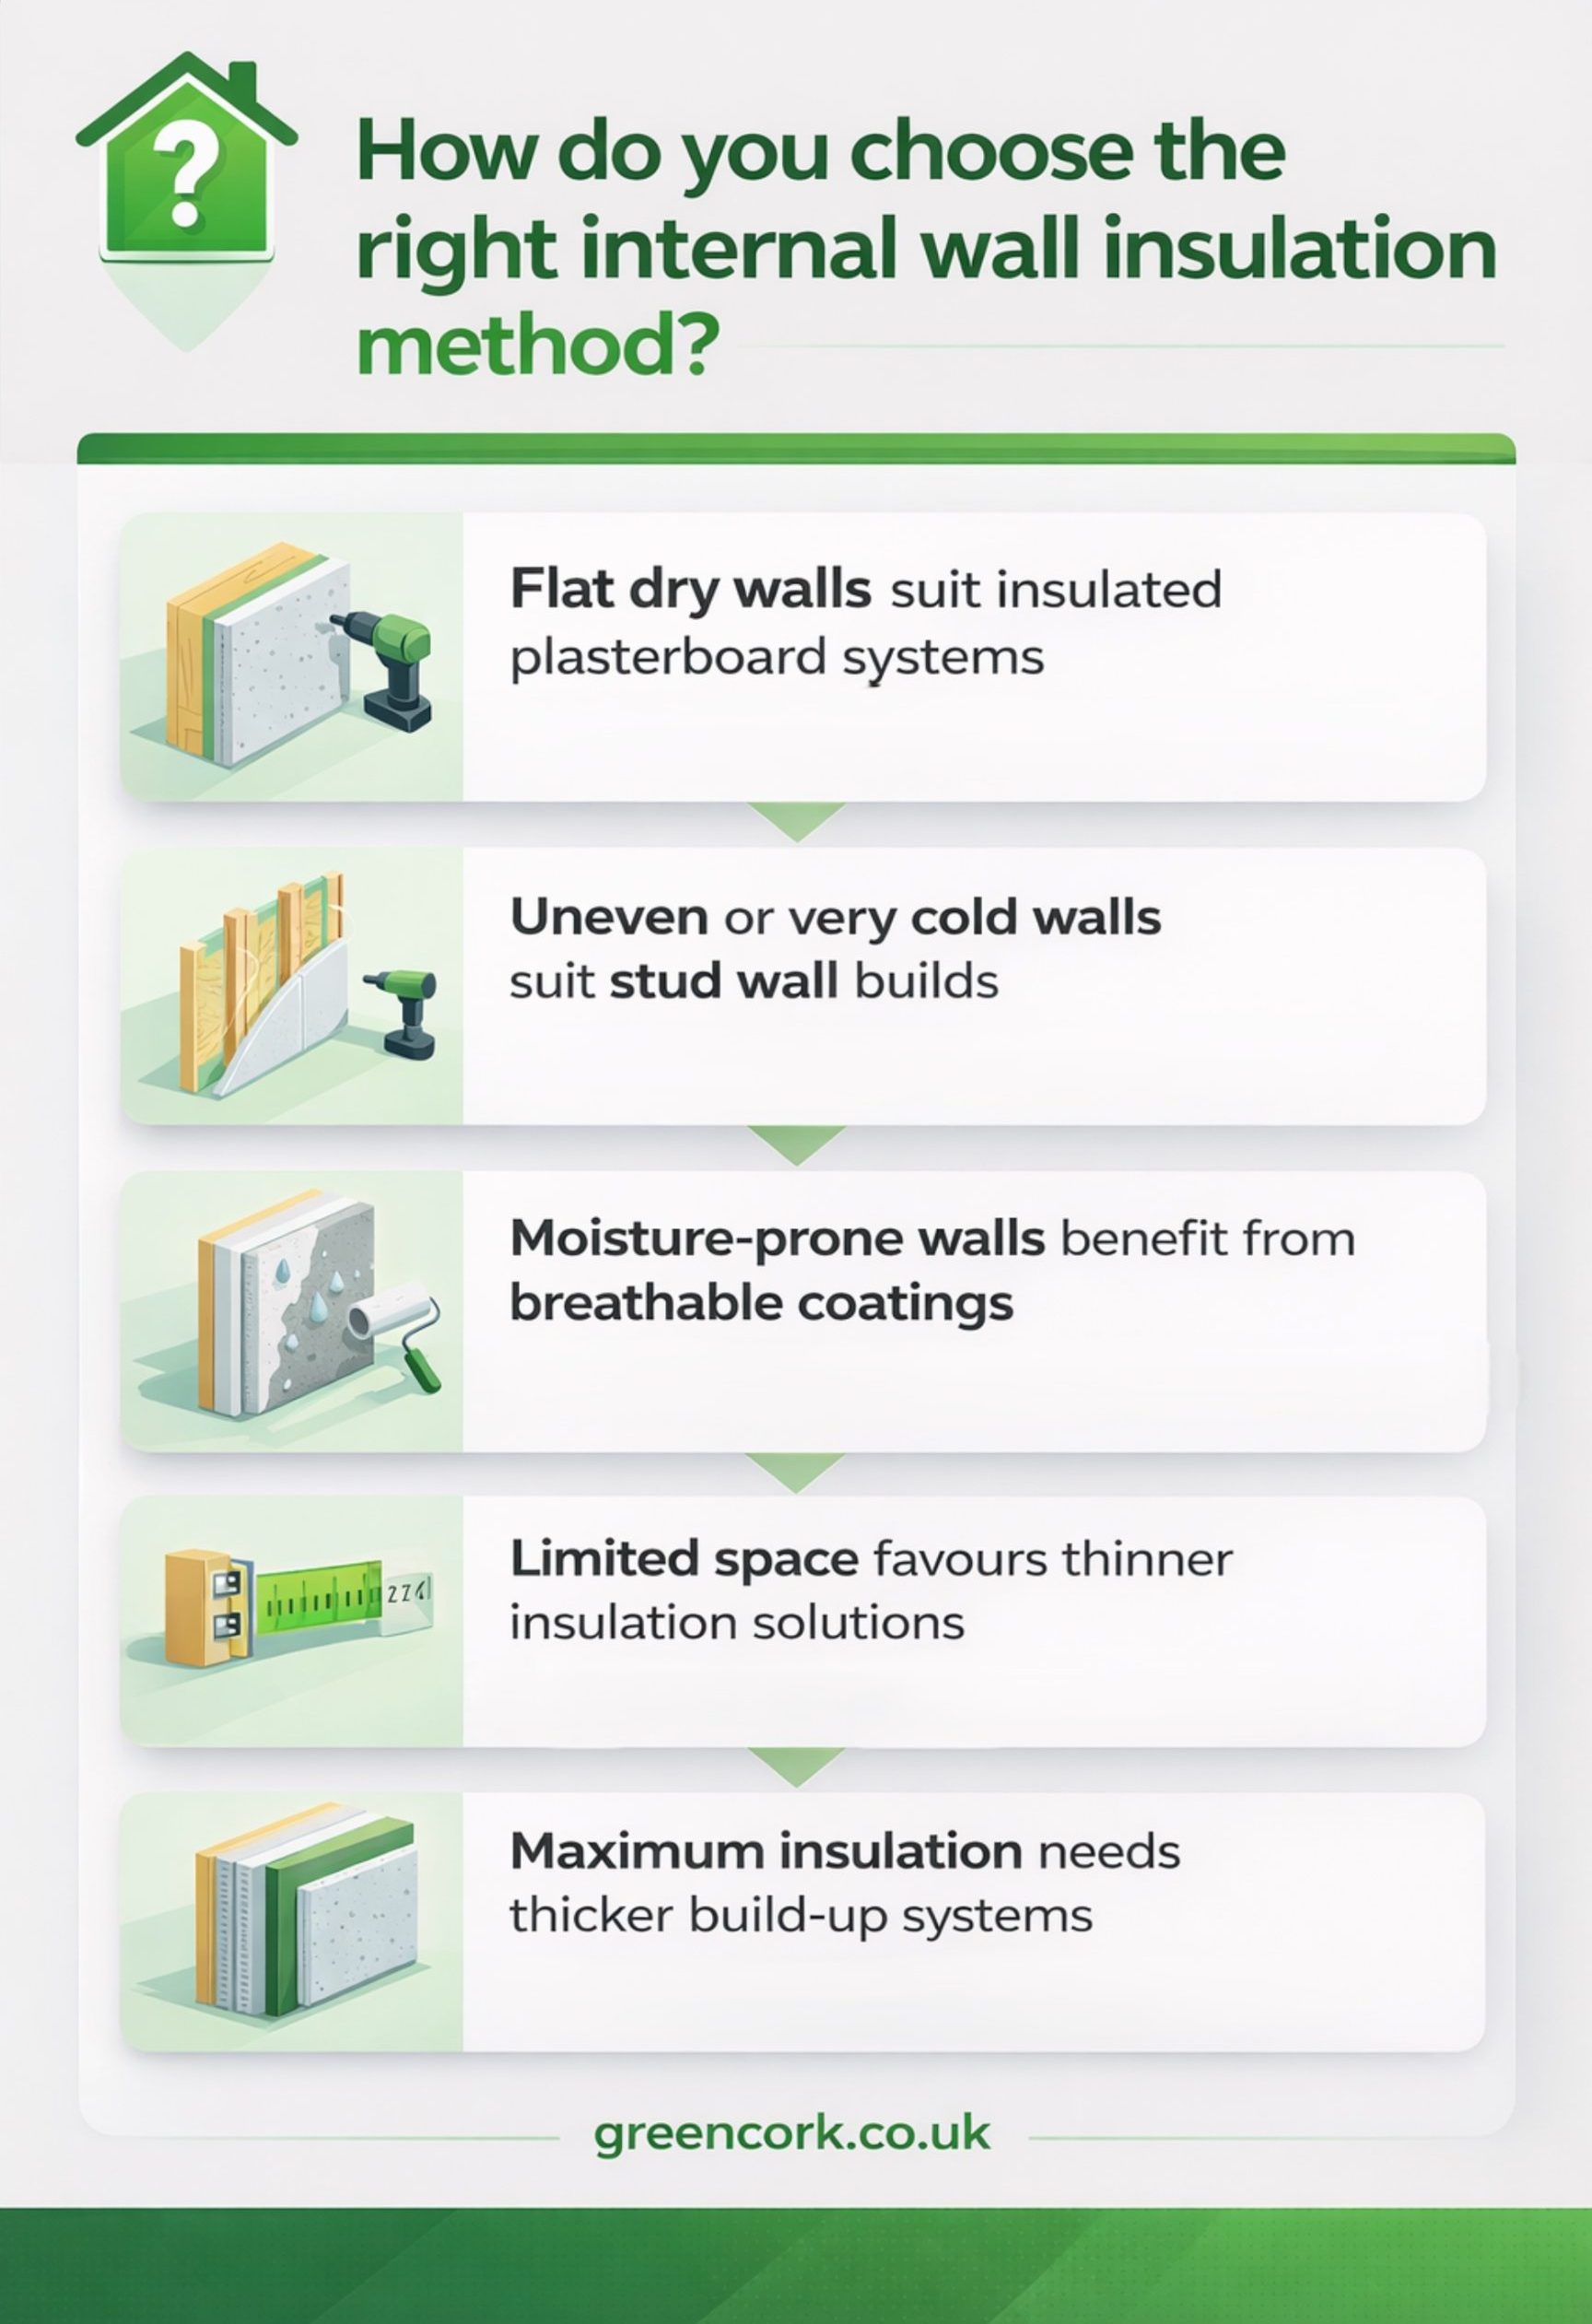
For a more detailed breakdown, see the table below:
| Situation | Recommended System | Why It Works |
|---|---|---|
| Dry flat wall, tight budget | Insulated plasterboard | Fast installation, acceptable performance, lower cost |
| Very cold wall, space available | Stud wall insulation | Maximum thermal improvement, room for thicker insulation |
| Damp-prone wall, limited space | Spray cork | Breathable structure manages moisture, minimal space loss |
| Uneven solid wall | Stud wall or battened board | Frame or battens create level surface for insulation |
| Historic building | Breathable system | Preserves vapour movement through original masonry |
For properties where internal space loss creates issues or where wall conditions favour outside treatment, we offer an external wall insulation service. It improves whole-wall thermal performance while keeping internal room space unchanged.
When to Get a Survey First
Not every wall suits internal insulation. A survey identifies issues early. Professional assessment is essential where faults exist, as insulation can worsen problems instead of resolving them.
A survey also makes sense when you notice any of these warning signs:
- Visible damp, mould, or dark staining on internal walls
- Walls that feel cold or damp, especially after rain or in winter
- Solid walls or pre-1930 homes where moisture behaves differently
- Leaks, cracks, failed render, or water ingress from gutters or roofs
- Large insulation plans where moisture issues could spread and raise costs
A proper assessment checks moisture levels, ventilation, and wall condition. This helps choose suitable insulation based on actual wall behaviour rather than guesswork.
The survey also reduces the risk of trapped moisture creating mould problems months or years after installation when remedial work costs far more than prevention would have.
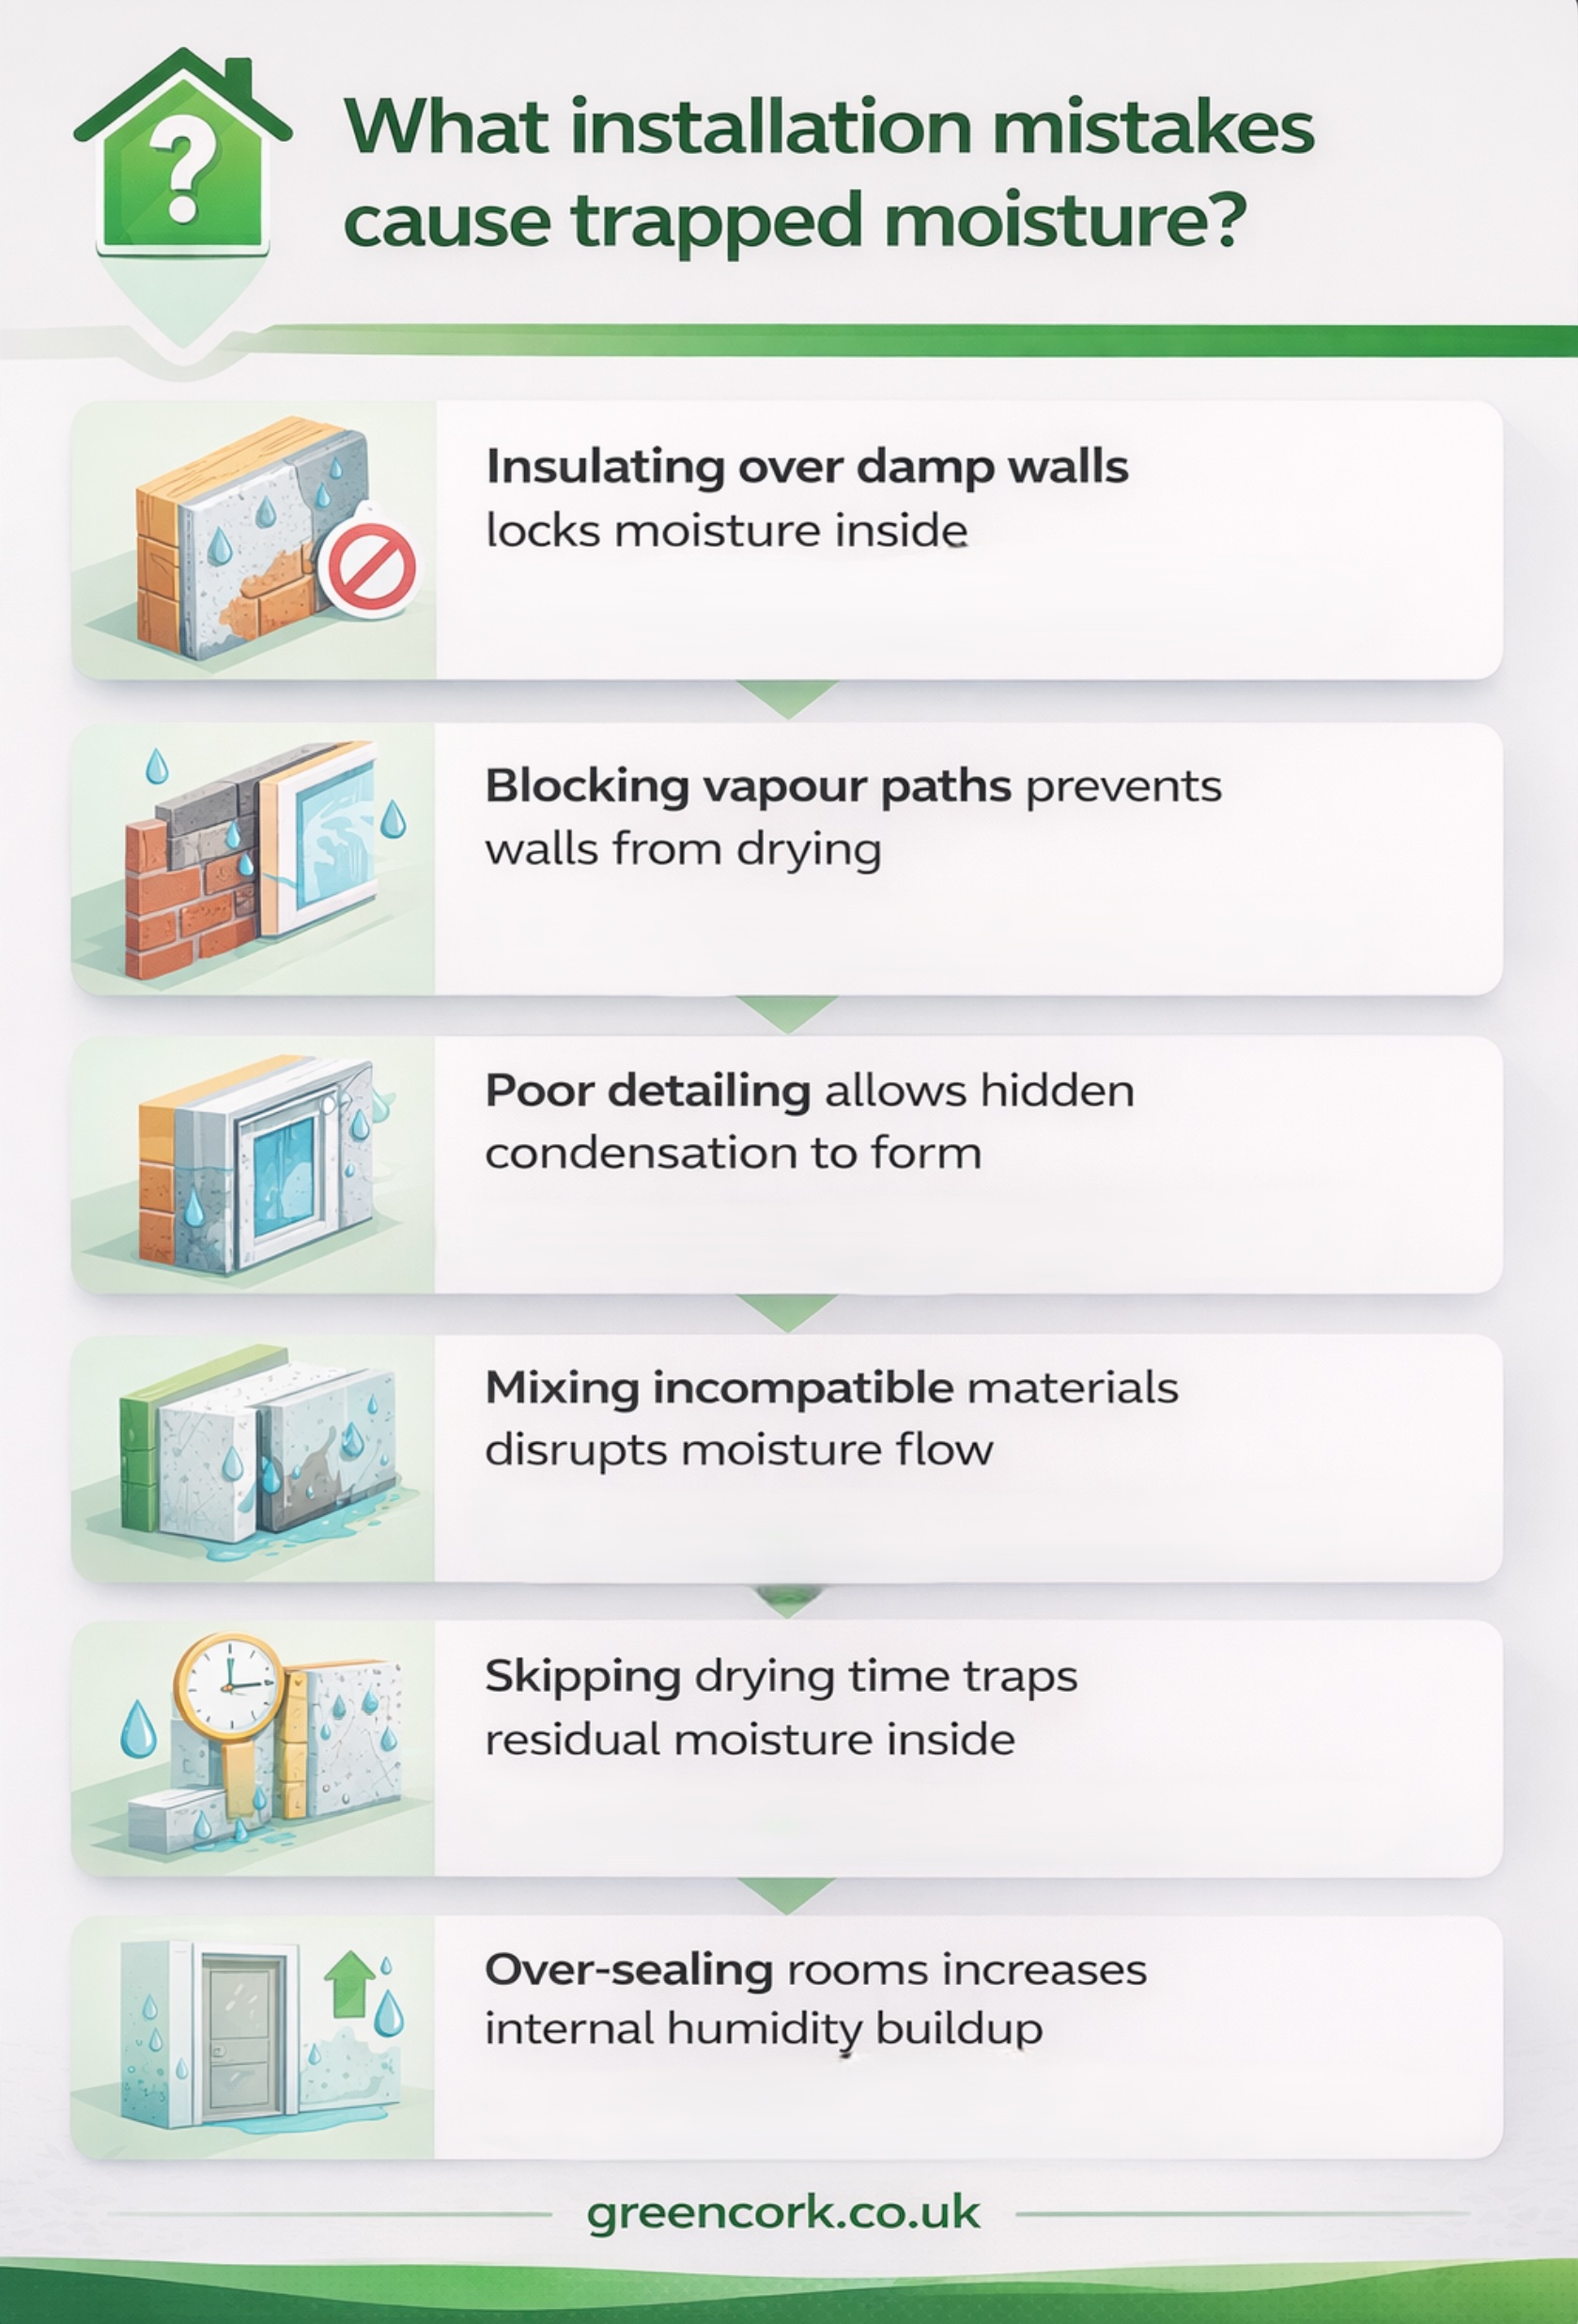
How to Install Internal Wall Insulation Without Trapping Moisture
Installation quality determines whether insulation stops heat loss safely or creates damp problems later. Preparation matters as much as the insulation itself.
Follow these essential steps in order before any insulation goes on:
- Check the wall is dry and repair leaks first. Fix gutters, roofing, and rising damp before covering the wall. Wet walls need drying out completely.
- Confirm ventilation is adequate. Rooms need airflow to remove moisture from cooking, breathing, and daily activities. Inadequate ventilation increases condensation risk regardless of insulation type.
- Seal gaps and treat junctions properly. Thermal bridges around windows, floors, ceilings, and party walls need careful detailing to maintain continuous coverage without cold spots.
- Maintain continuous coverage to reduce thermal bridges. Gaps in insulation create pathways for heat loss and cold spots where condensation forms.
- Finish with a suitable surface treatment. The final layer must match the insulation type and allow proper moisture behaviour across the wall assembly.
Installation flow differs slightly for each system, but the principles remain consistent.
Insulated plasterboard gets fixed to clean, dry walls using adhesive dabs or mechanical fixings. Boards must sit tight against the wall without voids behind them. Joints between boards get taped and filled.
Stud wall insulation requires building a frame first, then filling cavities completely with insulation material. Gaps around the frame perimeter and at junctions must be sealed. Services get planned before plasterboard goes on.
Spray cork gets applied onto prepared surfaces in controlled layers. Coverage stays continuous across the wall, including reveals and junctions. Drying happens between coats before final finishing.
Conclusion
The best internal insulation system depends on the wall, the moisture risk, and how much space the room can spare. Safe results come from choosing the right method before work starts, not fixing problems after they appear. Ready to explore your options? Contact us for a free quote and professional assessment of your property.
FAQs
What is the best way to insulate a cold wall from the inside?
The best method depends on wall condition and moisture risk. Spray cork suits damp-prone walls, stud systems give maximum performance, and insulated plasterboard works for dry flat walls on tight budgets.
Can you insulate a wall that already has damp or mould?
No. Fix the damp source first, dry the wall completely, and treat any mould before installing insulation. Covering damp walls traps moisture and makes problems worse.
Does internal wall insulation stop condensation?
It reduces condensation by raising internal surface temperatures, but proper ventilation remains essential. Insulation alone cannot compensate for inadequate airflow or high indoor humidity.
Is insulated plasterboard better than a stud wall?
Neither is universally better. Plasterboard costs less and installs faster but delivers less thermal improvement. Stud walls perform better but cost more and reduce room space further.
Will spray cork reduce heat loss enough on its own?
Spray cork improves thermal performance and manages moisture well in thinner applications. Larger heat loss reductions need thicker systems, but breathability and space preservation make spray cork valuable where those factors matter.