")

In this wall rendering cost guide we explain how much rendering costs and other factors that effect prices.
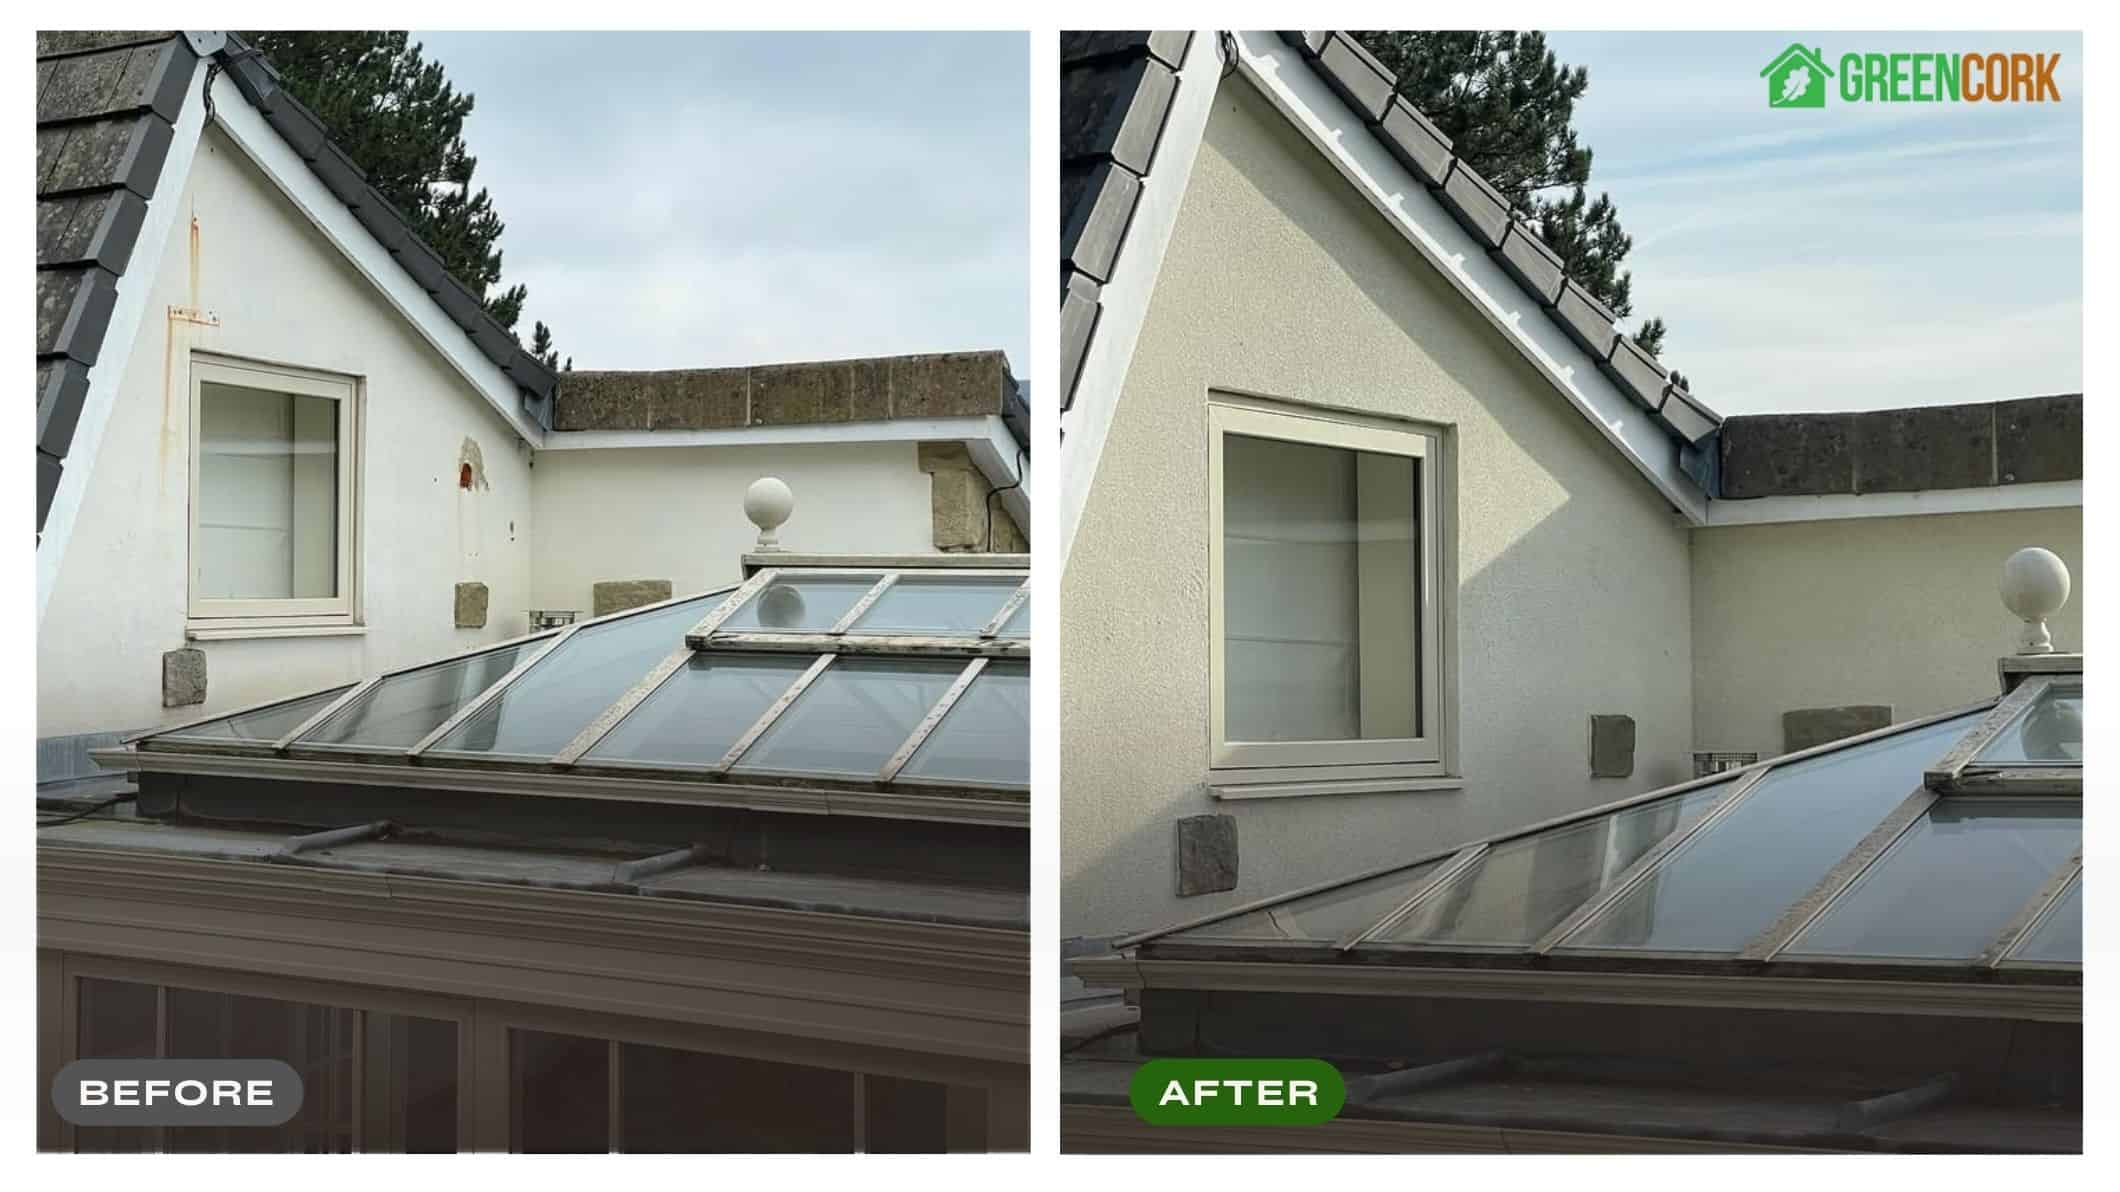
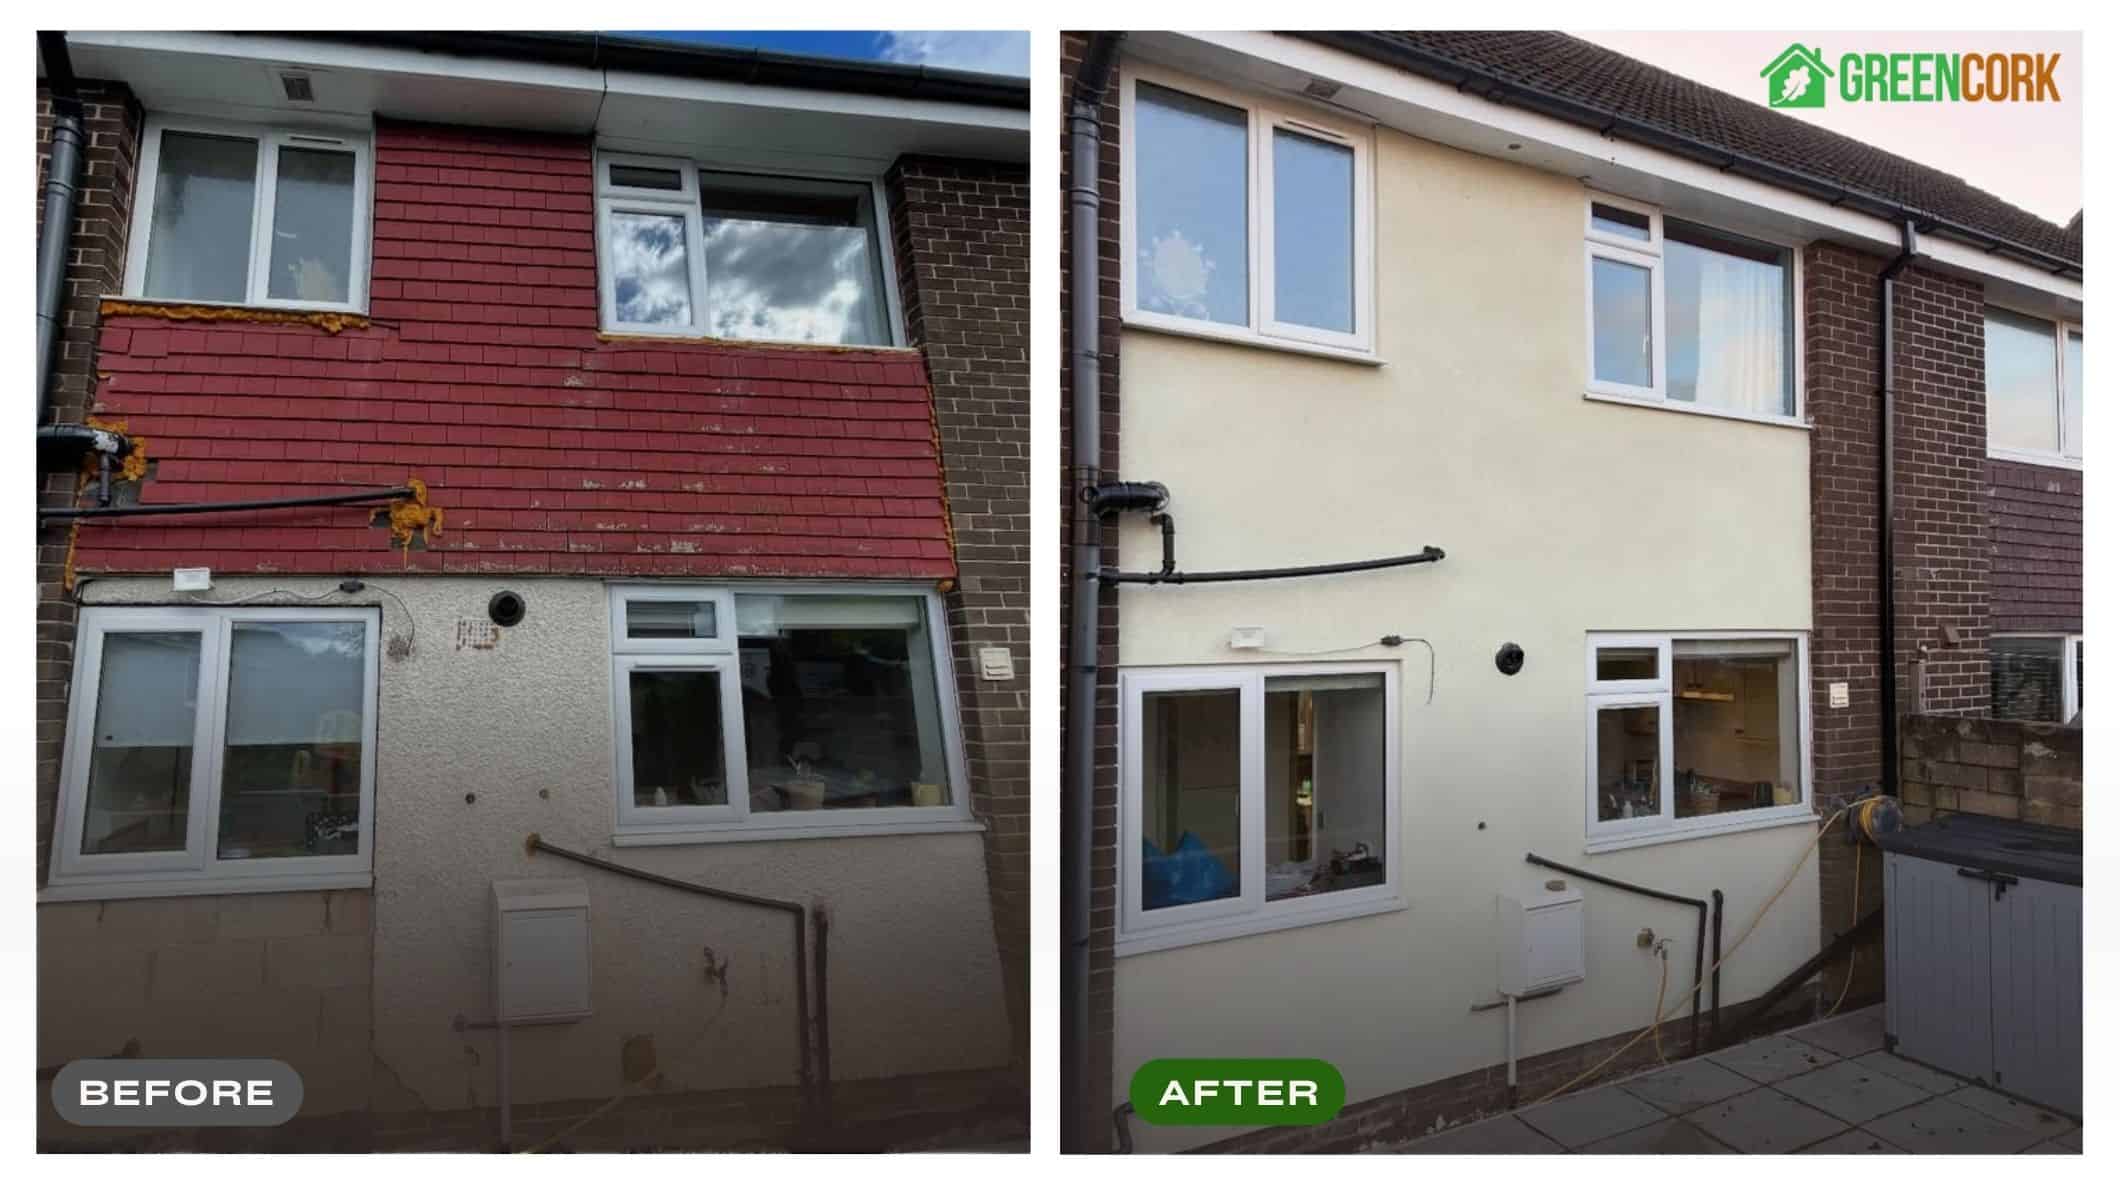
If you are thinking about giving your home a fresh look, house rendering might be just the thing you need. This exterior makeover can transform your property, boosting its kerb appeal and protecting it from the elements.
But How Much Does House Rendering Cost?
This guide will address the different factors to consider and the cost of the different types of house rendering.
Rendering your house is a significant project but it doesn’t have to break the bank. The process typically takes about a week depending on the size of your home and the chosen materials. Whether you’re looking to update an older property or add value to a new build, rendering can be a smart investment in your home’s future.
How Much Does Render Cost?
Sand and Cement Render Cost
Sand and cement render is a popular choice for many homeowners due to its affordability. Sand and cement render costs between £60 to £80 per square. It’s a durable option that offers a traditional look with hundreds of different colour options.
Keep in mind that while it’s budget-friendly, sand and cement render may require more upkeep over time. It can be prone to cracking so you might need to factor in costs for occasional repairs or repainting.
Silicone Render Cost
If you’re after a more modern and low maintenance option, silicone render might be right up your alley. Silicone render costs between £80 to £120 per square metre. However, the higher price tag comes with some notable benefits.
Silicone render is:
- Waterproof
- Highly breathable
- Self-cleaning
- Available in various colours
These features mean you’ll likely spend less on maintenance in the long run which could offset the initial higher cost.
SprayCork Render Cost
SprayCork render falls between sand and cement and silicone in terms of price. SprayCork render costs between £60 to £80 per square metre. This render is becoming increasingly popular due to its quick application and diverse colour options.
Benefits of SprayCork render include:
- Water-repellent properties
- Textured finish options
- Faster application than traditional renders
- Insulation benefits
- Long 25 year lifespan
While it’s not the cheapest option, its ease of application can help reduce labour costs.
Cost of Removing House Render
Before applying new render you might need to remove old render. This can add to your overall costs.
The price for render removal varies depending on the size of your property and the condition of the existing render.
Here’s a rough guide to render removal costs:
| Property Size | Estimated Cost |
|---|---|
| Small house (single bedroom, semi-detached) | £1,000 – £4,000 |
| Medium house (two-bedroom, semi-detached) | £2,000 – £6,000 |
| Large house (three-bedroom, semi-detached) | £4,000 – £8,000 |
Remember these are ballpark figures. The actual render removal cost can vary based on factors like accessibility and the type of render being removed.
When budgeting for your rendering project it’s crucial to consider the full scope of work including any necessary removal of old render.
The Total Cost of Rendering Your House Will Depend on Several Factors:
- Size of your property
- Type of render chosen
- Condition of existing walls
- Any preparatory work needed
For a typical three-bedroom semi-detached house, you might be looking at a total cost between £4,000 and £12,000. This includes labour and materials.
It’s worth getting quotes from several reputable renderers to compare prices. Always ensure they’re properly accredited to guarantee quality work.
Remember, while it might be tempting to go for the cheapest option, investing in a higher-quality render could save you money in the long run through reduced maintenance and increased durability.
Labour Costs & Project Timelines
When planning to render your house it’s crucial to factor in the costs of skilled labour.
The time needed to complete a rendering job varies. A typical project takes 4 to 10 days, depending on your property’s size and the chosen render type. Weather conditions also play a role in the timeline.
Your actual cost of house rendering may differ based on your location and specific requirements.
Hiring a pro renderer comes with perks. They often get discounts on materials which can help offset their fees.
Different renders have varying drying times:
- SprayCork renders: Can be dry in hours on a warm day
- Traditional renders: May take several days to dry fully
You’ll need to plan for these drying periods in your project timeline. Most renders also need dry weather for application so factor this into your schedule.
By understanding these aspects of labour costs and timeframes, you can better plan your budget and set realistic expectations for your house rendering project.
Additional Rendering Costs to Consider
When planning a rendering project it’s crucial to consider potential scaffolding costs. These can approximately £2,000 to your budget depending on the project’s scale, complexity and duration.
Surface preparation is another factor that can impact the overall cost. If the existing surface requires extensive cleaning, repairs or removal of old render, then you may need to budget an additional £10 to £30 per square metre.
Lastly, consider waste disposal. A skip for old render and excess materials typically costs at least £200. It’s advisable to negotiate with your rendering contractor to include this in their quote as they can usually manage the skip more efficiently than you could on your own.
By accounting for these factors in advance you can better prepare for the true cost of your rendering project and avoid unexpected expenses.
How Long Does Rendering Take to Dry?
The drying time depends on the weather and render type. Here’s a handy guide to help you determine when your render will be dry:
| Render Type | Cold Weather (Below 7°C – 16°C) | Warm Weather (17°C – 25°C) | Dries in Wet Weather? |
|---|---|---|---|
| Lime | 7 – 14 days | 3 – 5 days | No |
| Cement | 7 – 14 days | 3 – 5 days | No |
| Pebbledash | 7 – 14 days | 5 – 7 days | No |
| Polymer | 7 – 14 days | 3 – 5 days | Not really |
| Acrylic / Silicone | 7 – 10 days | 3 – 5 days | Not really |
| SprayCork | 7 – 10 days | 3 – 6 days | No |
Keep in mind that these are approximate times. Always check your render’s specific instructions and consider the current weather conditions before painting.
What Is House Rendering?
House rendering is a protective coating applied to the exterior walls of your home. It acts as a shield against rain and harsh weather conditions. You’ll typically need a skilled rendering expert to apply it properly.
The process involves covering your outer walls with a layer of material that, once dried, forms a sturdy barrier. This layer is then painted to enhance its durability and prevent cracking, which could let dampness seep through.
Your home’s exterior faces constant exposure to the elements. Without proper protection, you might encounter issues over time. Rendering helps minimise these problems by creating a defensive layer against weathering and erosion.
You can choose from different types of render, including:
- Cement-based
- Lime-based
- Modern resin-based
Each type offers varying levels of protection. The effectiveness of your render depends on the materials used, the quality of application, and your local climate.
When applying render, professionals mix powders or liquids with water or other chemicals to create a paste-like substance. They then spread this mixture over your walls using specialised tools like plasterer’s trowels. The result is a smooth, water-resistant surface.
Modern resin-based renders often come pre-mixed and ready to apply, making the process more straightforward than traditional methods.
By choosing to render your home, you’re investing in its long-term protection. It can help reduce maintenance costs and keep your property looking fresh for years to come.
Why Render Your House?
Rendering your house offers several key advantages. It can make your home more weather-resistant, which means less upkeep in the long run. Bricks are quite porous, so they soak up moisture from the air. This can lead to damp inside your home. A good render acts as a barrier, keeping that moisture out.
Some newer renders even help insulate your home better. This can cut your energy bills and make your house more eco-friendly. You’ll use less fuel to heat your home, which is good for both your wallet and the planet.
Damp and mould are big worries for homeowners. They look bad and can harm your health. Fixing them once they’ve set in can be costly and difficult. A render coat stops water getting into your walls in the first place. This helps keep damp and mould at bay.
Here are some key benefits of rendering:
- Improves weather resistance
- Reduces maintenance needs
- Helps prevent damp
- Can boost energy efficiency
- Protects against mould
If you’re worried about damp you might also want to look into damp proofing using spray cork insulation. It’s another way to protect your home from moisture.
Remember, a well-done render job is an investment in your home. It can save you money and hassle in the long term by keeping your house dry and warm.
Should You Get Your House Rendered?
Benefits
Rendering your house can offer several advantages. It provides a wide range of material options to suit different budgets. You’ll have countless colour choices to enhance your home’s appearance. It’s an excellent way to cover up unsightly brickwork or marks on your exterior walls.
House rendering acts as a protective barrier against moisture and mould. It may boost your property’s value and improve insulation. Some premium rendering materials can even deter vandalism.
- Variety of materials and colours
- Covers imperfections
- Protects against moisture
- Potentially increases property value
- May improve insulation
- Some types offer vandalism protection
How to Render a House From Start to Finish:
Preparation
- Site Assessment: Inspect the property to identify any issues like cracks, damp, or existing render that needs repair.
- Material Selection: Choose the type of render (e.g., traditional sand and cement, monocouche, silicone, or SprayCork).
- Surface Preparation: Clean the exterior walls to remove dirt, algae, and loose debris. Use a power washer if necessary.
- Repair and Patching: Fix any cracks, holes, or uneven surfaces with filler or patching material. Allow repairs to dry.
- Hack-off: If the current render is old, cracked or beyond repair. It is sometimes necessary to remove it all together and start afresh, in order to give it the longest possible lifespan.
- Masking: Cover windows, doors, drains, and other features with protective sheeting or masking tape.
Base Coat Application
- Priming (if required): Apply a primer or bonding agent to ensure good adhesion between the render and the wall.
- First Base Coat: Apply the first layer of base coat render using a trowel or spray gun. This layer should be around 8-10mm thick.
- Embedding Mesh: Embed a fiberglass mesh into the base coat while it’s still wet for added strength and crack resistance.
- Leveling: Smooth and level the base coat using a straight edge or darby. Allow it to partially dry, then sponge finish for a flat surface.
Curing and Drying
- Initial Curing: Allow the base coat to dry for at least 48 hours. Keep the wall covered or dampened if the weather is hot to avoid rapid drying and cracking.
Top Coat Application
- Mix Top Coat: Prepare the top coat render, ensuring the right consistency.
- Application of Top Coat: Apply the top coat with a trowel or spray machine to a thickness of around 6-8mm, depending on the render type.
- Texture Finish: Use a float, sponge, or brush to create the desired texture (e.g., smooth, stippled, or rough-cast). Work quickly to maintain a consistent finish.
- Final Touch-ups: Smooth out any imperfections while the render is still workable.
Drying and Finishing
- Curing: Allow the top coat to dry for about 5-7 days, depending on weather conditions.
- Remove Masking: Carefully remove any masking tape and protective sheeting.
- Clean-Up: Clean up any splashes or spills around the site, and ensure a neat finish.
Post-Rendering Care
- Final Cleanup: Remove all equipment and debris from the site, leaving it tidy for the client.
- Sealant (if applicable): Apply a sealant to the render if required for additional waterproofing or protection.
- Inspection: Inspect the render for any defects or imperfections and make any necessary adjustments.
Can Your Walls Be Rendered?
Before you start any rendering project, you need to check if your walls are suitable. The condition of your exterior walls is crucial for a successful render application.
Look for signs of damage or erosion on your walls. Are there any cracks? Is there an existing render coat? Have the walls been painted or glazed? What’s the overall structural condition?
It’s best to get a professional opinion. A surveyor or experienced tradesperson can assess your walls properly. If you’re planning to do it yourself, keep these points in mind:
- Check for weather cracks and erosion
- Fix any damage before applying render
- Remove old render if present
- Clean painted walls thoroughly
The structural stability of your walls is key. Render is usually hard and inflexible, so it needs a stable base. Any wall movement after rendering will lead to cracks and a poor finish.
For older homes, it’s wise to have a professional survey done. This isn’t as necessary for newer builds. A house survey in the UK typically costs around £500 which should be added to your rendering cost.
Remember:
- You can re-render walls that already have render
- Painted walls can often be cleaned and re-rendered
- Structural stability is crucial for a good finish
Planning permission may be required for some rendering projects, especially in conservation areas. Check with your local council before starting work.
Building regulations might also apply, particularly if you’re making significant changes to your home’s exterior. These regulations ensure your rendered walls meet safety and energy efficiency standards.
By assessing your walls carefully and following the proper steps, you can ensure your rendering project is a success. Take the time to prepare properly, and you’ll be rewarded with a beautiful, long-lasting finish for your home.
Fixing Damaged Render Costs
When your property’s render shows signs of wear, you don’t always need to replace it entirely. Often, repairing the damaged areas is a more cost-effective solution.
Small cracks, patches of missing render, and discoloured spots are common issues that can be fixed without breaking the bank. The cost of these repairs varies based on the type of render and the size of the affected area.
For basic cement render repairs, you might pay around £15 per square metre. If your home has modern acrylic or polymer render, expect to pay £25 to £30 per square metre for repairs.
Here’s a breakdown of patch repair costs for different render types:
| Render Type | 5 m² Patch | 10 m² Patch |
|---|---|---|
| Lime | £300 | £600 |
| Cement | £100 | £200 |
| Pebbledash | £300 | £600 |
| Polymer | £300 | £600 |
| Acrylic | £300 | £600 |
| Monocouche | £400 | £800 |
Discoloured render is often the easiest to fix. It usually costs about £20 per square metre to clean and repaint the affected area to match the rest of the wall.
While you might be tempted to tackle render repairs yourself, it’s often best to hire a professional. Look for a tradesperson with plenty of experience in render repair work. They’ll have the skills to match the existing render and ensure a seamless finish.
Prompt repair of damaged render is crucial. It’s not just about appearances – damaged render can lead to damp and mould problems if left unchecked. By addressing issues quickly, you’ll protect your home and avoid more costly repairs down the line.
Remember, repairing render is much cheaper than re-rendering your entire property. By staying on top of maintenance, you’ll keep your home looking good and save money in the long run.
Important Render Maintenance Costs
Render upkeep varies depending on the type you’ve chosen for your home. Most renderings need a fresh coat of paint every now and then. While this task can be as challenging as the initial application, you’ll be pleased to know it’s only necessary every 5-10 years.
To extend the life of your render’s top layer, whether it’s paint or coloured render, yearly cleaning is a wise choice. You can tackle this yourself or hire professionals for a quicker, easier solution. There are numerous tools available for exterior cleaning, from specialised brooms with hose attachments to soaps designed to remove stubborn grime.
Regular cleaning can significantly extend your render’s lifespan before any major work is needed. However, it’s important to remember that house rendering doesn’t last indefinitely. Even modern options like acrylic and polymer renders will eventually need their topcoat reapplied. This can be as costly as the original rendering job.
To get the most out of your investment, consider these maintenance tips:
- Schedule annual cleanings
- Address any cracks or damage promptly
- Repaint every 5-10 years as needed
- Check for signs of water ingress regularly
By following these steps, you’ll help ensure your render remains attractive and functional for years to come, protecting your home from the elements and maintaining its kerb appeal.
What goes wrong with render?
Render can develop issues over time, even when applied correctly. Cracks are a common problem. They start small but can worsen as rain seeps in and freezes, expanding the gaps. This happens because houses shift slightly with the seasons, putting stress on the rigid render surface.
To prevent water getting in, the top layer needs proper finishing with a sponge. Sometimes bubbles form in the render. This often occurs when the final coat is applied too quickly after the first one.
You might notice dark patches on your walls, especially near the ground. These can be:
- Black mould
- Green algae
These grow where walls stay damp due to less air movement and sunlight. Oddly, better insulation can make this worse by reducing heat flow through the walls.
Rough finishes like pebbledash tend to collect dirt easily. You can clean this with a good fungicidal wash and use special coatings to stop it coming back.
Rendered houses may also face:
- Powdery paint
- Flaking paint
- Damp inside walls causing indoor mould
- Loose render
- Visible past repairs
To avoid these issues, it’s crucial to hire a skilled professional for the job. They’ll know how to apply render properly and choose the right materials. For example, adding lime to the mix can help by making the render a bit more flexible.
Key Rendering Qualifications to Consider
When seeking quotes for rendering work, it’s crucial to check the qualifications of potential tradespeople. Ask about their training, completed courses, and areas of expertise. The City and Guilds award is a respected qualification to look for, with higher levels indicating more advanced training.
Not all renderers can undertake exterior rendering work to a high standard. Keep this in mind when selecting a professional.
Don’t forget to review customer feedback. Avoid tradespeople with poor reviews or bad reputations, regardless of their quoted price.
Insurance is vital. Make sure the tradesperson has proper liability cover for potential damages. This protects you from unexpected costs if issues arise during the project.
Here’s a quick checklist:
- Ask about training and specialisations
- Look for City and Guilds qualifications
- Check if they’re experienced in exterior work
- Read customer reviews carefully
- Confirm they have adequate insurance
Remember, a well-qualified and insured professional may cost more upfront but can save you money and stress in the long run. Great British Insulation Scheme might offer support for certain rendering projects, so it’s worth checking if you’re eligible.
By thoroughly vetting qualifications and insurance, you’ll be better positioned to choose a tradesperson who can deliver quality rendering work for your home.
Choosing a Professional for Your House Rendering
When you decide to get your house rendered finding the right renderer is crucial. Start by looking for local tradespeople in your area. You can easily get quotes from several nearby renderers. This will give you a good indication of how much rendering would cost.
Next, check for qualifications and certifications. These show the renderer’s expertise and training. Look at their past work and read feedback from other homeowners. This gives you a good idea of their skill level and reliability.
Always ask to see proof of liability insurance. This protects you if any damage occurs during the work.
Before starting, make sure you have:
- A written agreement outlining the job scope
- Clear details of included and excluded costs
- A plan for payments and receipts
By following these steps you’ll be well-prepared to hire a professional renderer who can deliver quality work on your home.
Want A Free Quote For A House Rendering Project?
GreenCork Ltd is a locally owned and operated Leeds rendering company, providing house rendering services across West Yorkshire and nearby areas.
If you are located within this catchment area and would like us to provide you with a free quote then please get in touch with our management team today.
Frequently Asked Questions
Is plastering different from rendering?
Plastering and rendering are similar processes, but they use different materials. Plastering is typically done inside your home, while rendering is an external process. Rendering protects your outside walls from the elements.
What building rules apply to house rendering?
Check with your local Building Control Department before rendering. If you’re covering more than 25% of a wall, you may need to upgrade its insulation. Listed buildings require planning permission for rendering. Building regulations can affect rendering costs.
How should you get surfaces ready for rendering?
Clean the walls thoroughly. Remove loose paint, dust, and grime. Scrub off mould with bleach or fungicide. Wash the walls and let them dry a bit. They don’t need to be bone-dry, but shouldn’t be soaking wet. Your renderer might do this prep work as part of their service.
Can I just repaint my walls instead of re-rendering?
If the render under your paint looks good, you can have a professional clean and repaint the surface. This is often cheaper than re-rendering.
Will new render patches stand out?
Smooth render finishes are easier to blend in than textured ones. The quality of the work and materials used make a big difference. Painting the whole wall after can help hide repairs. New render can affect your home’s appearance.
Can I keep my exposed brick look while rendering?
Once rendered, you won’t see the bricks underneath. But there are special glazes available that protect your walls like render but keep the brickwork visible.
Is lime render a good choice?
Lime render works well for older buildings. It’s more flexible and lets walls breathe better than cement render. While pricier, it might save you money long-term. Ask several renderers for advice on the best type for your home.
How long does house rendering usually last?
Good quality render can last 20-40 years with proper care. But this depends on the type of render and how well it’s applied. Cheaper materials might need replacing sooner. Render longevity affects its value for money.
Is rendering your house a good investment?
Rendering can boost your home’s value by improving its looks, energy efficiency, and weather resistance. But it’s not guaranteed to increase your house price. If you plan to live in your home for a while, rendering can help prevent future problems. Think carefully before deciding, as it’s a big job